Last Updated: February 15, 2024 at 21:34
|
Instructor:
Assoc. Prof. Dr. Murat SÖNMEZ
|
| Catalog Description |
| Syllabus |
|
Engineering
Softwares
being compatible with Autodesk
Inventor Glossary, (common technical words) Dictionary of Drafting Geometry |
|
Announcements & Lecture Notes: *As a student having an e-mail address with metu.edu.tr extension you may download Autodesk Inventor Software from the web page of "Autodesk Student Engineering & Design Community https://www.autodesk.com/education/home " by carrying out the instructions. (Before starting the downloading note the serial number and the product key, those will be shown on the page (Autodesk will inform you on the serial number and product key). For activating the software you should write the serial number and the key number during the installation and when you open the environment for the first time, select Activation option and input your password). FAQ (Frequently asked questions), Problem Form * System Requirements for Inventor Professional . * System Requirements for AutoCAD Mechanical * Stages of Installation for AutoCAD Mechanical * Stages of Installation for AutoDesk Inventor Professional * The CAD files those can be imported/exported to Inventor/from Inventor *Removing all Autodesk software products from a PC (if there is a difficulty in removing the software use "Windows Install Clean Up" ) *You may download the slides of the 1st Presentation ( on Introduction to Engineering Drawing ) by clicking here * You may download the slides of the 2nd Presentation ( on Tools and Instruments in "Board-Pencil Drawing vs CAD Drawing" ) by clicking here * You may download the slides of the 3rd Presentation ( on Structure of AutoCAD-Mechanical ) by clicking here * You may download the slides of the 4 th Presentation ( on Drawing Papers) by clicking here * You may download the slides of the 5 th Presentation ( on Working Drawings) by clicking here *You may download the slides of the 6 th Presentation ( on Types of Lines) by clicking here
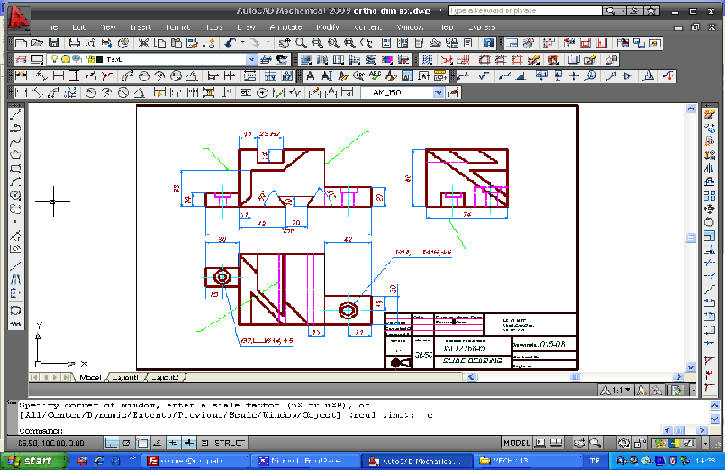
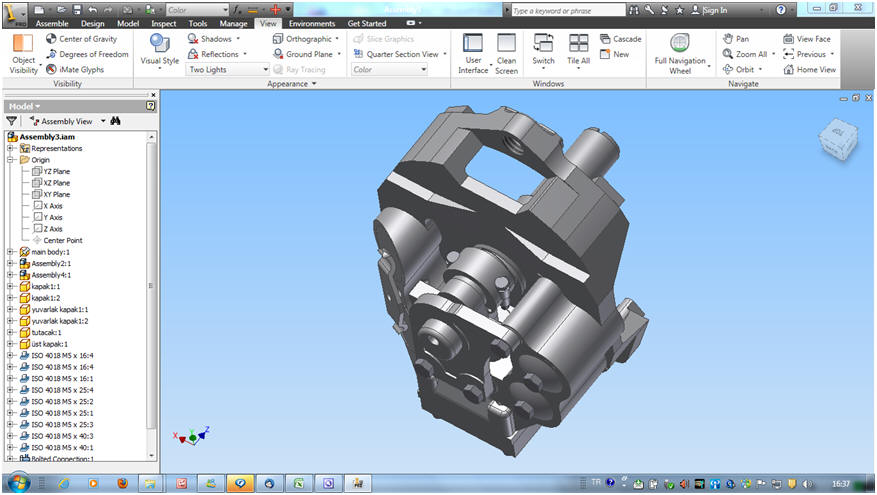
* 1st Angle (quadrant) Projection vs 3rd Angle Projection * Video Films: Primary Manufacturing Methods: 1) Cutting 2) Forging Hammering 3) Casting 4) Welding * Video film on revolved feature creation *Types of Holes and Annotations * Some Examples: Solid Models: E1, E2, E3 , E4 ( Bring the cursor on the link then right click the mouse, select save link option, save the file in partition E:, then open the file in Inventor environment) Orthographic Views in AutoCad Environment: E1, E2, E3 , E4 ( Bring the cursor on the link then right click the mouse, select save link option, save the file in partition E:, then open the file in AutoCad Mechanical environment) * You may download the slides of the 8 th Presentation ( Some Details on Orthographic Projection ) by clicking here *You may download the slides of the 9th Presentation ( on Dimensioning Principles ) by clicking here *You may download the slides of the 10 th Presentation ( on Size Tolerances ) by clicking here * Dimensioning EXAMPLES * How to configure dimensioning facility of AutoCAD? ( click on here ) * How to configure dimensioning facility of Autodesk Inventor? ( click on here ) *Auxiliary Views, Revolved Views * View Reading * Sweep Process (an example, click on here) |
| HW |
|
Work Sheets
* WS1 WS2 (Create the solid models in AutoCAD Mechanical, material: Stainless Steel) * Work Sheet #1a * Work Sheet #1b * Work Sheet#2a *Work Sheet#2b Work Sheet #2c Work Sheet # 2d * Work Sheet#3 * Work Sheet#4 * Work Sheet #5 *Work Sheet #6 *Work Sheet #7 *Work Sheet 7b * Work Sheet #8 *Work Sheet#8b * Work Sheet #9 * Slotted Sphere * Work Sheet # 10, Work Sheet #11, Work Sheet # 12, Work Sheet # 13, Work Sheet # 14, Work Sheet # 15 * Work Sheet # 16 Work Sheet #17 Work Sheet # 18 Work Sheet # 19 Work Sheet #20 |
| . |
 To my father